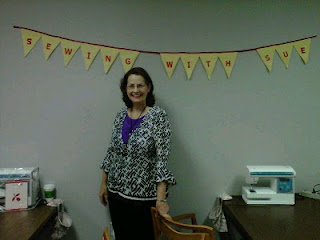
I made a "Thank You" gift for my sewing instructor Sue for all of the guidance, instruction, patience and friendship she has given me over the past year. Sue is such a wonderful woman and I have learned so much from her.
Here is a basic tutorial of how I put this together:
- I cut out 26 flag pieces 7 1/2" x 9 1/4". The amount of fabric you need will depend on the lettering you use. I chose 2 coordinating colors (and Sue mentioned to me a while back that she liked yellow).
- To make the letters, I chose the size (to fit the flag accordingly) 2" and font and printed it out. I then traced the letters on the paper side of paper-backed webbing. Make sure the right sides of the letter faces down on the paper side.
- To fuse, place the nubby side of the webbing on the wrong side of the fabric or paper side up.
- Fuse with the iron, cut out the letters. Remove the paper-backing and center them right side up and fuse.
- I appliqued the letters on with a zig zag satin stitch and sewed around the edges of each letter. To do a satin stitch set your width to about 3mm and the length to 5mm. This will make the stitch look as solid. Since this was my first time doing applique, going around curves was a challenge (I guess I will have to make more of these to get them just right LOL).
- I placed 2 triangles Right sides together and pin. I stitched with coordinating thread along the long edges of triangle, using 1/4" seam allowance. Trim the seam allowance at the point to 1/8". Turn the flag Right, sides out, using a point turner (I used a chopstick to make my corners pointy). You can also do a satin stitch along the edges, Wrong sides together, instead of turning them out.
- Fold the flag's top edges in by 1/4". Press and topstitch.
- One all the triangles are assembled, arrange each triangle-letter so that the top edge of each triangle overlaps the next by a scant 1". Sew across this area to secure.
- Center the entire banner on ribbon, cord or bias tape. I chose single fold bias tape about 4 yards long. Make sure to leave spaces between words (or add an additional blank flag) and leave extra on the sides to either tie a bow or fold over a 1/4" and stitch closed.
- Have fun and enjoy your new beautiful banner.
**Quick update - I am almost done with my quilted jacket. I just have to hem it. The wool coat will also be done this weekend and I will post pictures.
Have a wonderful day and weekend!!


Oh wow...what a wonderful gift idea. Well done.
ReplyDelete